To Add an Icon in the Form Header
You can have form header icons automatically added from Themes, or customize your form header icons and not use the ones set under Themes.
This topic explains how to add icons to your Form Header and not use the icons from Themes > System Icons.
You can add an icon to a form header for a specific form or all forms. To add it for a specific form, see the directions below. To add the icon so its the default for all your Forms, go to Themes > [Name of your Theme] > Applications, then follow the steps below.
1. In Form, set the Heading > Visible property to True.
2. Tap the SystemIcons ... button or expand it if an icon already exists.
3. The Manage Icons Collection displays.
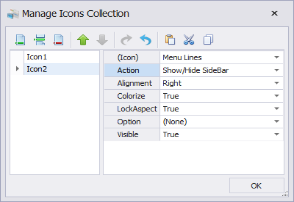
a. Click on the append button (first green bar) to add an icon.
b. (Icon) If the icon is a customized icon, set (Icon) = (Custom), then expand the list and enter the Name of the icon from Select Image Resource list.
Otherwise, select an icon from the drop down list. Note that icons in the drop down list may already be linked to an action. For example, if you selected the "Reload" icon, and Action is set to "Call Event" this icon will appear at the top of your Form and execute a reload of form contents when the user taps this icon at run time.
c. Action - Select an action from the list. This links the icon to an action that is provided by RFgen.
If you have scripted an event action, then select Call Event.
d. Assign values to the remaining properties for the icon.
e. Click OK.
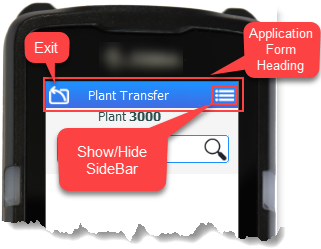
4. The icon should show up in the header. In the example above, icon 1 is the Exit icon and icon 2 is the Menu Lines icon.
5. Test the icon action in Application Testing.